
Adaptive Card Approvals in Outlook – Part 3
Handling Reassigned Approvals with Adaptive Cards
Welcome to Part 3 in our series on Adaptive Cards in Outlook! In Part 1, we covered how to craft and send an Adaptive Card to kick off your approval process. Part 2 showed how to use Adaptive Cards instead of the standard Approval responses. Today, we're going to take it one step further—what happens when a user reassigns their approval to someone else?
Let’s dive in.
Step 1: Detecting a Reassigned Approval Request
To respond to reassigned approvals, we first need to monitor the Approval Request table—one of the key system tables used by Power Automate to track approvals.
If you remember from Part 2, each new approval creates a corresponding record in the Approval Request table. When an approval is reassigned, a new record is also created—but with a key difference.


Here's how to identify reassigned approvals:
Create a Trigger Flow
Use the When a row is added, modified, or deleted (Dataverse) trigger and point it to the Approval Request table.Select Columns: msdyn_flow_approvalrequestidx_reassignedfromid
Filter Rows: msdyn_flow_approvalrequestidx_reassignedfromid ne '<none>'
This ensures the flow only triggers for reassigned approvals. The default value is
<none>when first created—so we’re only interested in rows with a reassignment reference.
Initialize Variables
Environment ID – Store your environment's GUID.
Tenant ID – Store your tenant ID (used to build direct approval links).
Get Row by ID
Pull in all the data from the specific Approval Request record.Extract the Approval ID
Initialize a variable using the following formula to get the Approval ID in lowercase:
toLower(outputs('Get_a_row_by_ID_Approval_Request')?['body/msdyn_flow_approvalrequestidx_approvalid'])
Step 2: Match the Reassignment to Your SharePoint Record
Now that we know which approval was reassigned, we need to determine if it matches one of your internal SharePoint records.
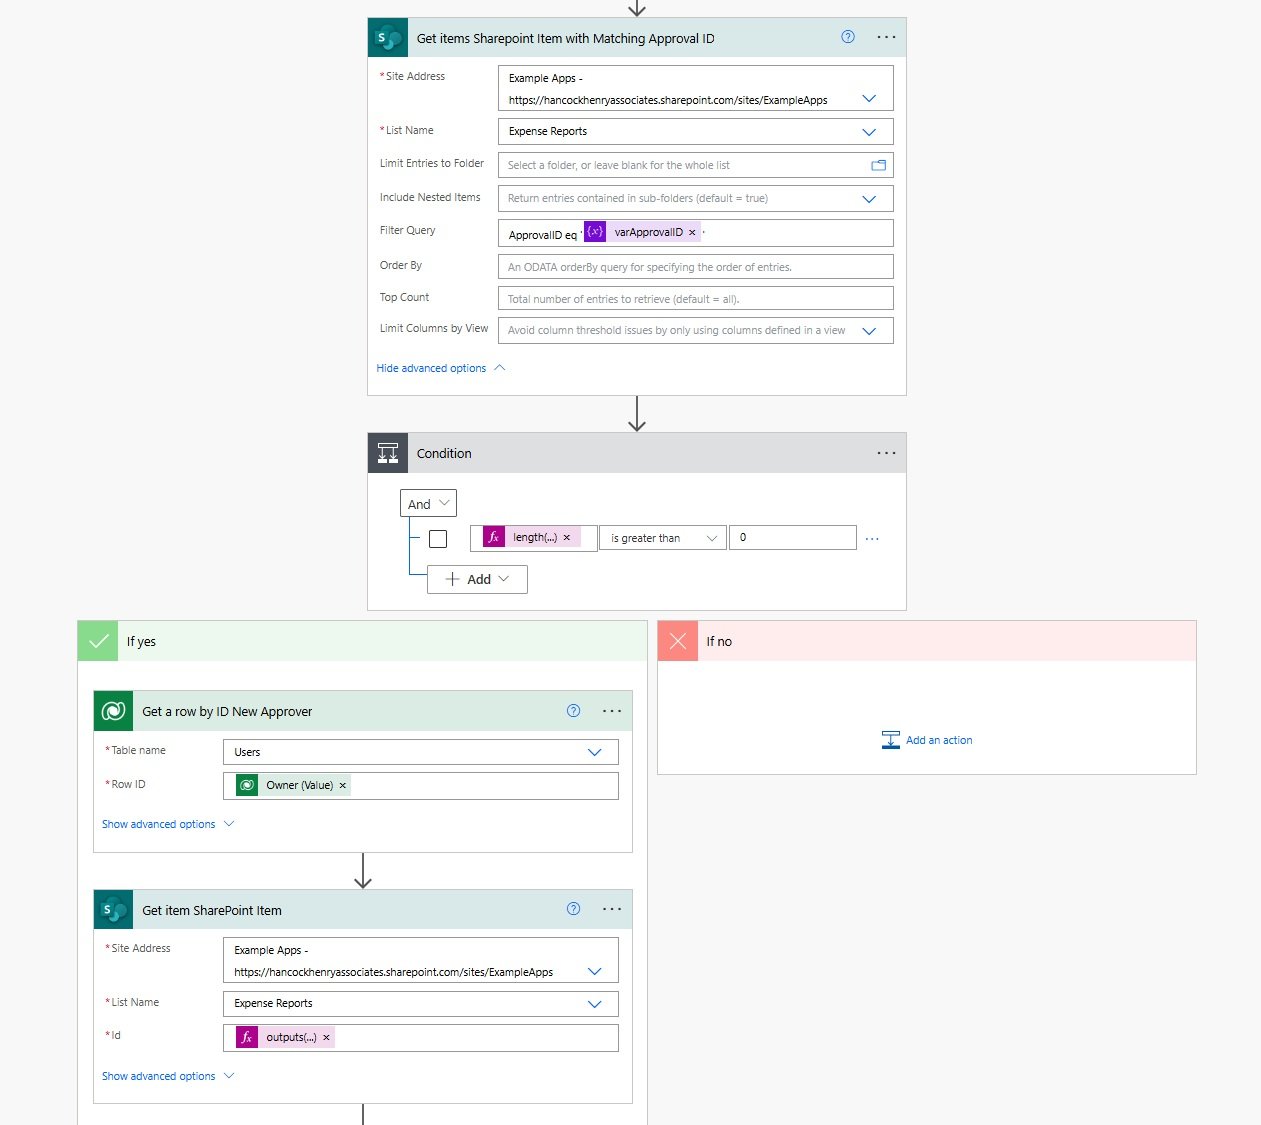
Get Items from SharePoint
Use the Get items action to search your list for a record with the matching Approval ID.Check for Results
Add a Condition to ensure the length of the result is greater than 0: length(outputs('Get_items')?['body/value'])Get the Reassigned User
Pull the owner of the Approval Request—this is your new approver.Get SharePoint Item Details
Use this formula to grab the SharePoint item ID from your previousGet Itemsaction:
outputs('Get_items_Sharepoint_Item_with_Matching_Approval_ID')?['body']?['value'][0]?['ID']
Step 3: Send the Adaptive Card to the New Approver
Now that we have everything we need, it’s time to build and send the Adaptive Card.
Compose the Approval Link
Since this reassigned request didn’t go through the usual "Create an Approval" process, we need to manually craft the link to the approval page:https://make.powerautomate.com/environments/{Environment}/approvals/received/{ApprovalID}?loginTenant={TenantID}
Build the Adaptive Card
Refer back to Part 1 to construct your Adaptive Card. You’ll want to include:The approval details
A button linking to the approval (using the URL above)
Send the Email
Use the Send an email (V2) or Post an Adaptive Card in Outlook action to send the card directly to the reassigned approver.

Wrapping Up
Thanks for joining me on this deep dive into Adaptive Cards and Microsoft Approvals. We've now looked at how to:
Start approvals with Adaptive Cards
Replace standard responses with custom actions
Handle reassigned approvals and keep your flow on track
If you have questions or suggestions for future posts, drop them in the comments below or message me directly—I’d love to hear what you’re building!